 Disney Tips Your Guide To A Great Disney Vacation
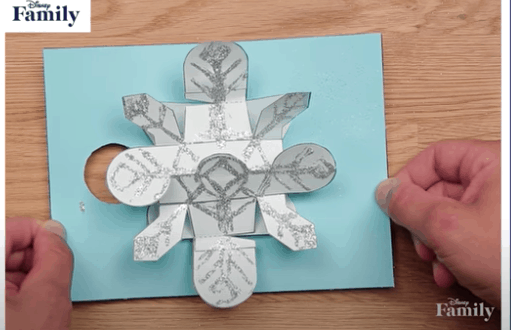
Get creative with this DIY pop-up Frozen snowflake card from Disney Family. A fun card to give to a loved one this winter.
[google_ad]
What You’ll Need
- Pop-Up Snowflake Card Template From Disney Family
- White cardstock
- Blue cardstock (or any other color that you’d like the card to be!)
- Ruler
- Paperclip
- Scissors
- Glue
- Glitter, sequins, and other fun embellishments of your choice!
[google_ad_btf]
How To Make It
- Print template on cardstock. Print page 1 of the PDF onto white cardstock and page 2 of the PDF onto blue cardstock.
- Press along all of the dotted lines with a paperclip. Use a ruler as a straight edge, scoring the paper, or making it easier for the paper to fold.
- Carefully cut out each of the pieces from both pages of the template. From the second page, cut out the circle to create the window into the card.
- Begin to fold the pieces of the template. The dot-dash lines should receive a mountain fold, with the folds going upwards to create a mountain. The dotted lines should receive a valley fold, with the folds bending downwards to create a valley.
- Make sure your card has been folded. Open it face-up with the circle window on the left, and the lettering facing up.
- Apply a thin layer of glue onto areas A and B of the blue card. Align the A and B template (white cardstock) within the space. Hold in place until glue is dry.
- Apply a thin layer of glue to areas C and D on the white cardstock Pop that you just attached to the card. Align the edges of the E and F template (white cardstock) onto the C and D spaces. Hold in place until glue is dry.
- Place the final two template pieces on areas E and F. The piece with one bubble goes on area E with the bubble on the left, facing downward. The piece with two bubbles goes on area F with the bubbles on the right, facing upwards. Hold in place until glue is dry.
- Once dry, carefully close the card. The pops should fold together. Decorate the cover of your card with glitter, sequins, or any other fun embellishments that you like! We also added a little glitter to the snowflake too!
We hope you enjoy this fun Frozen pop-up card craft. A fun way to add some magic to the winter months.
Source: Disney Family