 Disney Tips Your Guide To A Great Disney Vacation
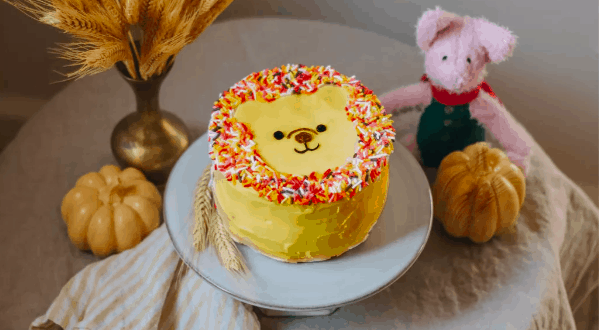
Treat yourself to something sweet and adorable with this Winnie the Pooh cake inspired by our favorite silly ol’ bear. Disney Family posted this cake recently and we can’t wait to try it out ourselves.
[google_ad]
Here is what you need to make this Winnie the Pooh themed cake:
-Your favorite cake recipe
-Two small round cake pans
-White frosting
-Yellow food dye
-Multicolored sprinkles
-Black and brown decorative icing
-Wax paper
-Scissors
-Pencil
-Tweezers
[google_ad_btf]
Next are the step-by-step directions:
Step One: Preheat your oven and prepare your batter according to your favorite cake recipe. Pour the batter into two greased, round cake pans. Carefully place in the oven to bake.
Step Two: While your cakes are baking, sketch out a Winnie the Pooh face shape onto wax paper and cut it out. It should be about 2-inch smaller than your cake pans. We used 6-inch pans, so I made my Winnie the Pooh about 4-inch tall. Set aside.
Step Three: Remove the cakes from the oven. Let them cool completely before removing them from the pans.
Step Four: After cooling, gently remove the cakes from the pans and place them on a flat surface or plate. Using a bread knife, cut off the rounded tops of the cakes so they are flat on top.
Step Five: Place the first cake layer on your cake stand, and frost the top; then place the second cake layer on top and frost all over to create a crumb coat. Place the cakes in the fridge for a few minutes before adding the rest of the frosting. This will help keep the frosting firm and make it easier to get a nice smooth finish and full coverage.
Step Six: Mix drops of yellow food dye with the rest of your white frosting. Start with only one or two drops for a light pastel color, and add more as desired. Generously frost over the white crumb coat.
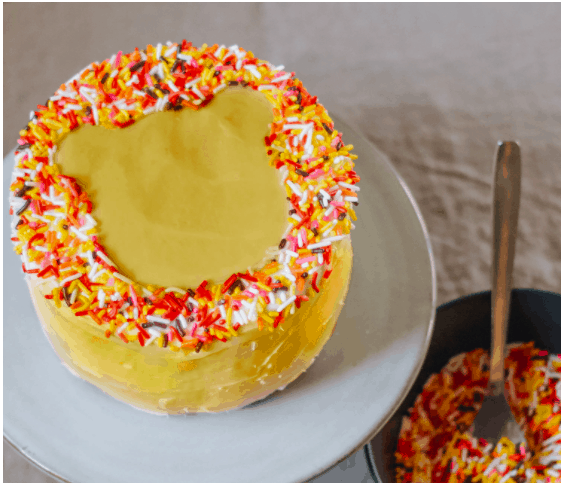
Step Seven: Place your wax paper Winnie the Pooh template on top of the cake. Press the template lightly to make sure it’s nice and smooth.
Step Eight: Use a spoon to distribute the sprinkles all over the cake, especially around the edges. Gently dust off extra sprinkles from the wax paper template, then very carefully use tweezers to remove the template. Use a spoon or knife to smooth out any frosting that’s affected by this process.
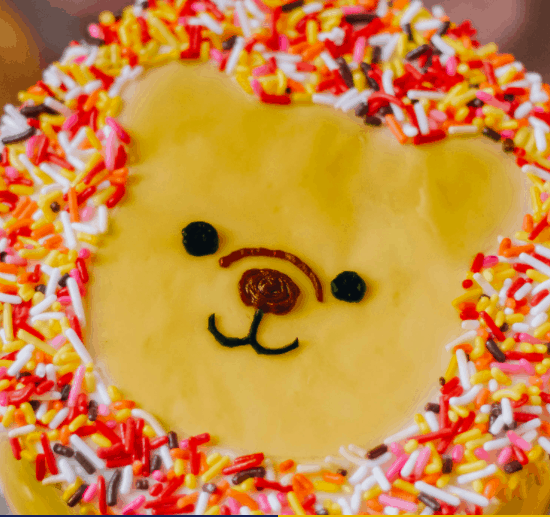
Step Nine: Pipe Winnie the Pooh’s nose with brown icing. Use the black icing for his mouth and eyes.
Final Step: ENJOY
We love Winnie the Pooh and can’t wait to try-out this simple, yet adorable cake.
Source: Disney Family